photo BlogButton_zpsf979d556.jpg  photo AboutMeButton_zps0d48ecc3.jpg  photo FinishesButton_zps92f1f16c.jpg  photo TutorialsButton_zps33a38379.jpg  photo RTQLabel_zps71a4ad0f.jpg

26 October 2014

Blogger's Quilt Festival - Night Music in the Desert

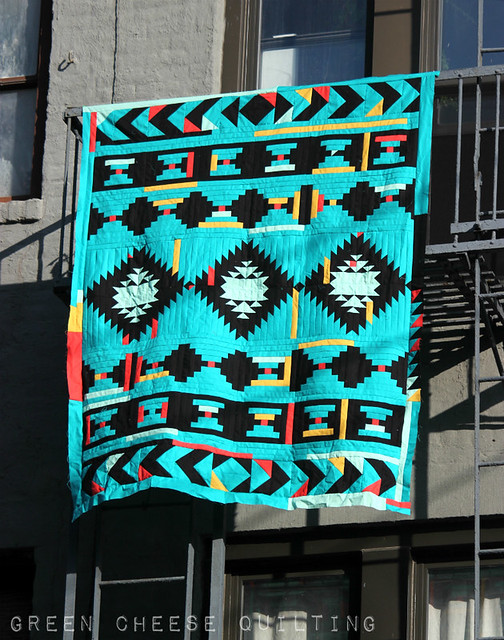
I've decided to enter my Night Music in the Desert quilt into this fall's Blogger's Quilt Festival. I'm entering this bad boy into the Original Design category, where it faces much stiff competition.

Desert Music
I was so excited when I finished the top!

In this quit I really embraced my love of log cabins and improv. I used 5 solids for the top, mostly Kona Jade (I think)

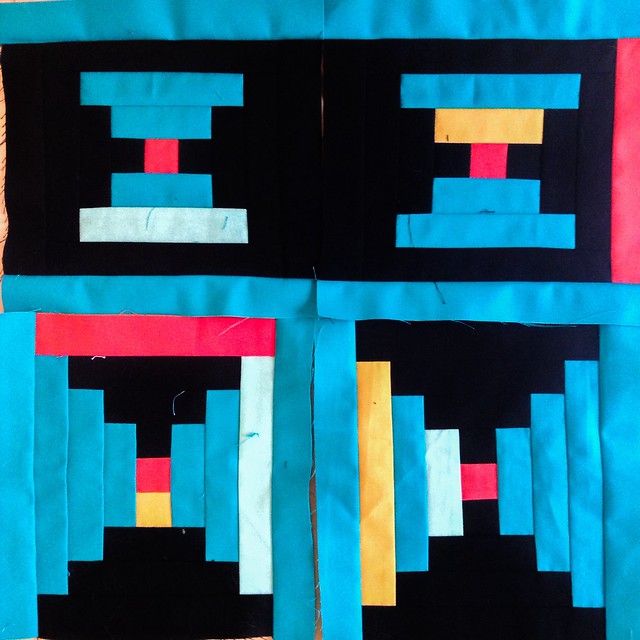
I had seen some log cabin quilts on pinterest...or someone's blog...or somewhere in the internet. Of course I didn't pin it myself. I'd also had the color scheme in mind, and it lead to some test blocks. Unfortunately, the test blocks didn't quite cut it, so I turned them into potholders for my sister and one of her friends. 

Potholders!
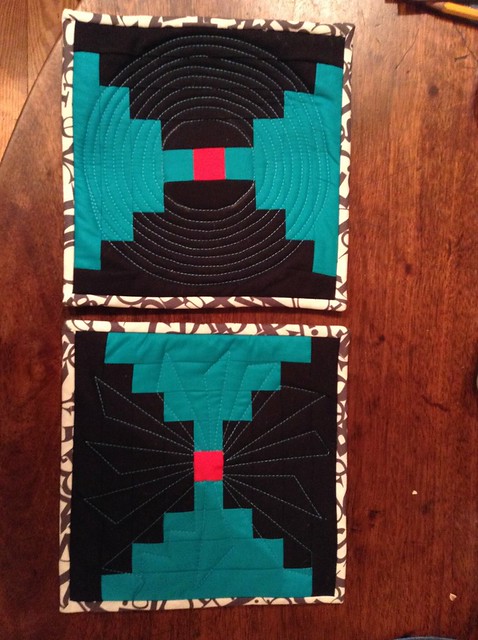
Test blocks become potholders. 

Eventually I got my act together, and sketched out a pattern (which looks vaguely like the finished quilt), and realized if I wanted to go forward with the design I needed to add in some additional colors. I started by incorporating improv color strips into the center row, and I knew that it was the right decision.

Southwest-speration Quilt Center Panel
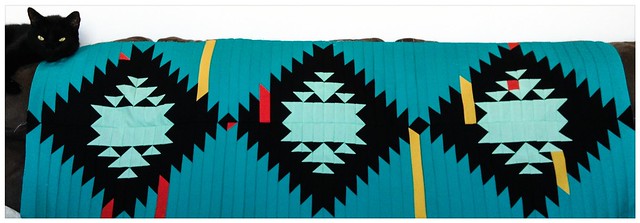
Center complete. Now let's just let it sit for a few months...

So, back in January, 2014 I was well on my way! Just a few more blocks and I'm done! It only took me 7 and a half  months until I was actually done! As is often the case, the quilt kept hitting the back burner. I would sew in spurts, six log cabins here, 4 here, until they were all done.

Log Cabin Obsession
Fun with Courthouse Squares. And extra threads. 

Finally, I got the quilt finished, picked out a backing and brought it to my parents house (much easier to baste there). I got it all basted together and then didn't.know.what.to.do. 

After a couple more weeks I realized a square spiral would not push my skill set too far, and would complement the top without distracting too much from my piecing and color choices. 

Night Music in the Desert
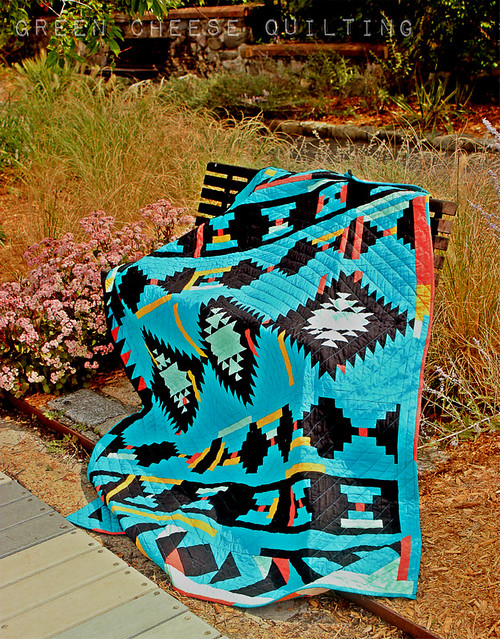
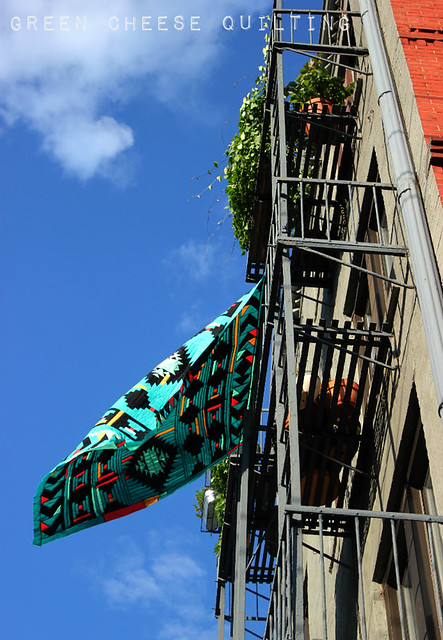
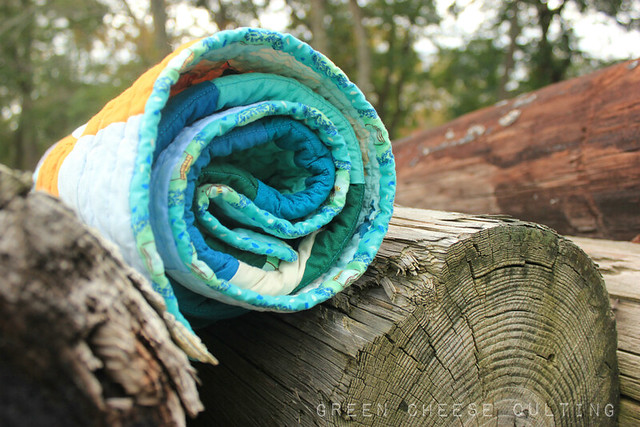
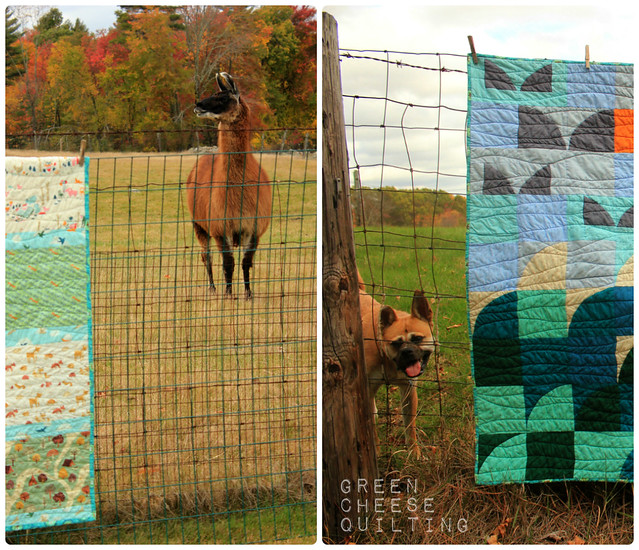
All quilted up and in the park!

Now the quilt sits on my couch. It's covered in pet hair, which clearly means it's much loved. I'd show you it's natural habitat, although I'm a little too embarrassed!

It was a great exercise in spontaneous piecing, as I just threw in colors when I felt like it, and then hoped for the best. Know how many extra blocks I made, so that I could play around with layouts? None. I feel like it helps me stretch my creative muscles, and work on compromise. Not everything has to be perfect! At least that's what I tell myself when my quilting stitches change length randomly and my lines wiggle too much. We'll see if I can keep up this mentality on future quilts.

I had created the layout for the most part (the only wild cards were the flying geese rows on the top and bottom), and then added on the borders while everything was on the design wall. The quilt measures somewhere in the ballpark of 60" by 72"...I think. I don't know where my measurements are and that's my estimate based on counting the blocks and attempting to recall their sizes. 

Thanks for stopping by! If you're so inclined, I've got a couple of other posts on the finished quilt and finished flimsy

Desert MusicAmysCreativeSide.com

17 October 2014

Seaside Baby Quilt - Finished!

I finished the baby quilt! And, another little project with the scraps (I'll show the extra project a little later).

Seaside Baby Quilt
The 'front' of the quilt. 

As I previously mentioned, I wanted to try and create an abstract representation of the seaside, and sun, and birds flying. It's ok, although there are numerous things I would tweak (color choices, some sizing of the curves). So, I created a simple striped back, using child-friendly fabrics. That way it's fully reversible!

Seaside Baby Quilt
The 'back' of the quilt. 

I was going with an outdoors/animal theme for this side. I used two layers of batting because I wanted the quilt to be kind of puffy, although I'm not sure how much I actually like it. I was just thinking that in Florida it's kinda hot...not a huge demand for quilts...could be a playmat, too? 

Seaside Baby Quilt
Back and quilting detail. 

I quilted all over with horizontal wavy lines. It represents wind, water, and goes well with horizontal stripes. Winning all around! I used a bit of wee wander for the binding, and love how it complemented both sides of the quilt!

Seaside Baby Quilt
Quilt or log? 

All in all, this was a quick quilt to put together, and I really enjoyed the curved piecing. I like that it's reversible, and I like the colors for a boy quilt. Do I sound like I'm trying to convince myself? There are definitely things I'd change on a future model, but I'm happy with this one, and proud to send it onto it's new home.

Seaside Baby Quilt
Cameos by Big Red and Picasso. 

In other news, the animals had fun observing my photoshoot on the Farm! 

13 October 2014

Round Trip Quilts - First Round!

Well, I've survived the first round of our round robin-style bee. This is turning into a really fun experience because it's really pushing me creatively - and we've only gone through one cycle!

I first received Heather of QA Creations center. Her theme is beautiful: wishes for her daughter. She included a great paper pieced sail boat and some phrases that she'd like for us to incorporate as we are able to.

Paper pieced boat
Photo from Heather's Blog.

I knew that the idea of incorporating the phrases and the paper pieced block would allow me a bit of leeway regarding adding borders. I could be asymmetric! I looked through the phrases and 'care' jumped out at me.

My initial sketch. I pretty much stayed true to it!

As I was thinking about wishes, I thought about wishing upon a star, and how whimsical wonky stars can be. I also saw that Heather mentioned the Wee Wander collection, and thought that the fireflies would make excellent centers for wonky stars to wish upon!

Round Trip Quilts
Star light, star bright...

I was feeling like I had too many 'masculine' colors in the quilt. Although my favorite (and I'm sure many other women also have this favorite) color is blue, I know that traditional quilts for girls have warmer colors. So, I wanted to try and get some bright, fun colors in. I went with some nice pinks and had them transition from the water using snail trail blocks because they reminded me of waves. I drafted them myself to get the 4" blocks, but somehow the last section's seam allowance was off and I couldn't figure any solution. It adds to the movement of the water, I hope!

Round Trip Quilts
Snail trails, 4" square. Fun, and tricky, to make. 

I added in some purple beneath the snail trail waves, and some low volumes to fill out the top section with the 'care' message, and voila, my work was done. 

Round Trip Quilts
All together now!

Hopefully the quilt is moving in the right direction. So far my favorite addition is the golden star in the bottom right (that's right, metallic gold! Every little girl's dream come true!) I can't wait to see what Jennifer does with it, and I'm looking forward to seeing what I get next. I like the challenge of this style bee, and I like that we've given ourselves 6 weeks for each round!

If you want to see what the others are up to check out my RTQ page for updated links to everyone's progress!


10 October 2014

Finish Along - Q4

Last quarter was my first time participating in the Finish Along hosted by The Littlest Thistle. I completed two of my four goals, which isn't that bad. This quarter I've got a whole bunch more WiPs that I want to knock out. Let's see if being ambitious will pay off!

First up, I'm going to roll over my The Birds and The Butterflies quilting project. I feel like if I can just take the time to mark the lines I'll be able to get that quilt done! Plus, I really want to put it on my bed, it's getting chilly!

Basting
Over 400 pins used in basting this bad-boy!

Next up, and this should be a quick finish, I want to finish my herringbone cowl. I started it 2 years ago, and have half a skein left to go. I just need to sit down, watch a few shows and FINISH IT UP! Once again, it's cold, I need it to stay warm!

 photo IMG_2436_zps83a22564.jpg
Here's what the stitch looks like.
I've got plenty of missed stitches/improv sections, it's not all this nice!

I've got a pattern I'm developing for a pillow. So far I'm working through the paper piecing of it. I need to add a border and quilt it up, then turn it into a pillow, likely a wedding gift for my bosses. 

 photo 97310082-0208-46b0-85eb-88f691ab4905_zps8e6e3967.jpg
Red Hook. A little busy - hence the motivation to gift it. 

I've got a set of cushions planned for my couch. Just need to finish up a few more of these improv log cabins, piece them together and magically (or not so magically) turn them into cushions. 

 photo IMG_2412_zps6a329f34.jpg
Each block is 5.25". Aiming for 18.5" square cushions for 20" inserts.

I've also got a boxy pouch planned for my friend who's a new mom. She can use it for her stuff and match the quilt I made her son, or she can use it for some of his supplies. So far I've just got strips cut and fabric chosen on this one. 

 photo IMG_2438_zpsb1778934.jpg
Looks like I need to iron, too!

I'm halfway through my EPP project, which you might have followed along with in my tutorials. I need to make one more panel, and then I can turn them into an eyeglasses case! I'm pleased with how the Arizona fabrics play together here.

 photo IMG_2434_zps302f069e.jpg
70 3/4" hexagons, all ladder stitched together. 

The final goalI've set for myself, I want to get done by Thanksgiving. I attempted to make another Colette Moneta earlier this summer, but that failed miserably. This time I'm going to attempt it on my new-to-me serger, and finish with a double needle on my regular machine. Fingers crossed, otherwise I'll be in a potato sack for the holiday!

 photo IMG_2435_zps4758c1f8.jpg
Love this AMH knit! Hope I can make it work!

Well, now that I'm feeling overwhelmed I'm going to take a break and work on some bee blocks. So, basically I'll let this list sit and rest for a bit! Wish me luck!

02 October 2014

How I English Paper Piece - Part 3: Joining Rows

When last I left you I had created rows of hexagons. I thought I'd show how I join those rows, because sometimes the idea of manhandling all those carefully basted hexagons can be intimidating. Don't worry, it's pretty difficult to 'ruin' them!

 photo 2rows_zps8519eeba.jpg
Starting point. Two rows. 

I sew each row together continuously. The first step to this process is aligning your first seam segment. For the rows I've got pictured, you're going to want to flip the top row over so you've got right sides together, and rotate the rows so you've got the edges you want to start sewing aligned correctly. 

 photo alligncollage_zps14e5b4cf.jpg
Arrows show where we will start joining the rows,
so where we want to align in the first image,
and you can see how the rows are flipped and rotated
to meet this objective in the second image. 

I sew this first segment just like I sewed the individual hexagons together, except I don't knot the thread at the end, I just do a backstitch to help reinforce my stitches. Image 2 below shows the seam I stitched with the solid white line, and the seam I'm going to move to with the dashed white line. How do I do this? I need to bend that first hexagon. In image 3 you can see where it's going to bend with the pink dashed line. Image 4 shows the rows aligned (with a bent hexagon) as I'm sewing that next seam. I haven't removed the paper, I keep them in as long as possible to add stability as I work along the row. 

 photo stitchingrowscollage_zpse188c2b1.jpg
Sewing down the row. Don't be afraid to bend those basted hexagons!

Continue in this manner until you get to the end of the row. Once you reach the end just knot and tie your thread like you did when you were sewing the single hexies into a row. 

You should have something that looks like this: 

 photo attached_rows_zps04498271.jpg
2 rows sewn together!

I keep the papers in until I have to remove them because I need more, or until I'm ready to start quilting. You'll see that process in the next installment. For now I'm going to keep sewing rows together until I get a panel large enough for a glasses case!

Here's Picasso helping me with some quality control. As you can see, the hand stitching is holding up nicely!

 photo testingPhase_zpse57aca05.jpg
Picasso loves helping me sew.